Welcome to part 2
So we know how to insert and record the sounds in FL. Now i am going to show you how i quantize the recordings in the layers and which filters and effects i use in the mixer to make the beat sound better.
When you don't quantize your recordings, your beat will probably sound off-beat, that's not what you want. Let's try to make a kick and a snare pattern on a 96 tempo. Don't forget to turn on the metronome cause that will help you press the keys on the right time.
I just recorded 4 kicks and 4 snares (4 second loop). When i play it back it sounds really off-beat, the kick and snare are not in line with the metronome. Stop it and let's go to the kick piano roll. You will see 4 green bars but not recorded right. Click on the the magnet. Now choose the 1/6 step. More grids (blocks) appeared. I select the 1/6 step because sometimes i like to make off-beat tracks, and on the 1/6 you can change it slightly. If you can't count 32 grids between the 1st and 2nd bar, then select the magnifier in the toolbar and click in the piano roll to zoom in.
Now we are going to quantize the kicks manually. I like to do it manually because the quantize tool doesn't always works great for me. But if you want to use it, that's fine with me.
Click on the pencil tool and press play again. Drag the 4 kicks to the lines where the metronome hits and do exactly the same for the snares. You won't even hear the metronome anymore if you did it right (kick, snare, kick, snare). But maybe the beat doesn't loop perfect. You can fix that by stretching all the 4 snares. Use the pencil tool again and go with your mouse over the end of the green snare bar. Hold the left mouse button and stretch it 8 grids (blocks). Do the same for the other 3 green bars. Now they are all 8 grids long. Press ctrl+a to highlight everything in the snare piano roll and press play again. Your loop is perfect now! You can do the same for the kicks if you want, stretch or make them smaller.
To make your loop longer, let's say 1 min, you simply copy paste the recordings and put them on the right spots.(ctrl+a/ctrl+c/ctrl+v)
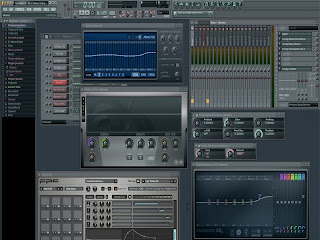
Ok let's check out the mixer. In the mix master track (the 1st one with the yellow FX block) are 8 effects slots. On nr 8 you can see the fruity limiter. It's a band compressor and i always leave it on default, but feel free to check out the other presets.
Now i'm going to tell you one of my mixer - master secrets, which effects/filters i use. On nr 1: the EQUO. On nr 2: the Fruity Bass Boost. On nr 3: the Fruity Blood Overdrive. On nr 4: Fruity Parametric EQ2. On nr 8 i leave the Fruity limiter.
So now there are 5 effects you have to tweak. Ofcourse you can do it your way but i will tell you how i do it my way, since it's my blog ;). In the EQUO i select the curve mode (bell shape) and i start dragging the left middle part (bass) a little bit up with my mouse. I do the same for the treble, it's on the right side.
The Fruity Bass Boost gives the bass in your beat a real boost so you might wan to lower it down. Turn the knob next to the FBB to the left. I always turn it down to 25/30%.
For the Blood Overdrive i do the same, 25/30%. Gives the beat more volume.
In the Fruity Parametric EQ 2 i tweak all the sliders, just a little bit.
Last but not least, the Fruity Limiter. I always use the default settings, but feel free to check out the other compressions.
Do all these things while the beat is playing. But be warned! The sound you hear in FL studio is way different than the actual mp3. Because the data you are playing in FL is raw and when you save it as wav or mp3 it comes out clean. Most of the time you think that you didn't put enough treble or bass on your beat so you going wild on the EQ or Bass Boost.
Just convert the beat to mp3 or wav, listen to it and if it doesn't sound right, go back to the mixer - master and redo some of your tweakings. That's how i did it and still do it.
You also can tweak your layers separately. Maybe you only want your kick or melody to have more bass.
Click on the kick layer and then select the insert 1 track (next to the master track). Do Ctrl+L and now you have a stand alone kick track.
In part 3 i will be talking about some more mixing and mastering and Vsti's (virtual instruments) How to install and how to use them.
So please stay tuned for part 3....
Here you can watch the video tutorial

No comments:
Post a Comment