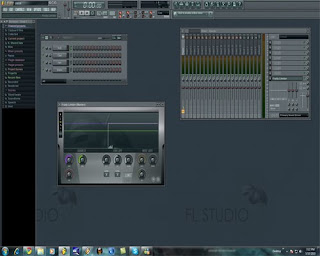
Hello fellow beat makers,
FL can be used for all genres. I've been working in FL for over 4 years now and i still love it.
First of all you want to have your midi/usb keyboard plugged into your pc. Open FL studio and test if the keyboard works, it should play the kick sample when u press a key. If it doesn't work then you can go to the options tab and click on the midi settings. Find the keyboard brand you are using in the input list, click on it and select the enable button, the box becomes orange. Now it should work, press x to close it.
In the FL mainscreen, on the left side you will see a browser with channel presets, clipboard files, collected etc etc. There you can find all the FL stock sounds. Let's say you want to use a channel presets sound. Click on it and it will show you a drop down menu with 3x Osc, Automation clips etc etc.
Click on the 3x Osc and it will show you another drop down menu with lots of sounds.
Now you can drag and drop one of the sounds onto your kick layer of the channel window. The channel window is the big grey block with the kick, clap, hat, snare layers in it. Simply drag and drop, let's say accordeon to your kick layer, the name will change into accordeon. Now you can play the sound on your keyboard.
If you are looking for another kick or snare sample, go to the packs folder in the browser and it will show you 8 drum kits and some more stuff. Just drag and drop it like explained earlier. Another way to insert sounds in your layers is by doing a right click on one of the layers, left click on insert and it will show you all the vsti’s (virtual instruments) and other stuff.
Let’s try sytrus, that is a FL vsti with lots of different instruments and sounds build in. Now you see the sytrus keyboard. If you want to use another sound in the sytrus, simply click on the left or right triangle next to the x button. Or you click on the white triangle on the left side, go to presets and all the instruments will pop up.
Ok let’s try to record something. On the FL transport panel, you will see the play, stop record buttons. The tempo is on 140. You might want to slow it down to 106 or 96. You can decide for yourself, but since you are a beginner, I would recommend you to put it much slower.
The metronome (stick with a swoosh) and the countdown (321) boxes should be on (orange) On the time bar it shows 1:01:000. That too you can change. Just click on the 2nd small block on the time bar that says BM it’s really small. Now it’s set to 0:00:00, much better right?
Press the record button and then the play button. It will count down from 4 to 1. Now you can play something while it’s recording. Press the stop button when you are done playing. You will see some green bars in the piano roll, that means that FL recorded your play, congrats ;)
Click again on the record button to uncheck the recording. Now you can listen to what you have recorded by pressing the play button. If you don’t like it then you can right click on the green bars and that way you can delete them one by one. Or maybe you want to delete everything all in once. Make sure the piano roll is selected, ctrl+ a to highlight everything and then press del. A pink bar appears, do the ctrl+ a again to remove it. You want to remove it because maybe you want to record something longer or shorter.
Yes so we recorded a melody or a drum pattern on the 1st layer.
Now we can do some more recording on the other layers. Just do the same things i explained earlier.So let’s say you have recorded in 4 layers. 1:kick pattern, 2:snare pattern, 3:melody, 4:bassline, and you want to save your work and play it in winamp or whatever music player you are using.
Go to file>save as, give it a file name and the save type should be on Fruity loops (flp). Now you just saved your music project, maybe you want to edit it later.
Go back to file>export and click on mp3 file. Give it a file name and the save type should be on MPEG layer 3 (mp3). Click on save, a grey box appears with lots of options.
On my next blog i will be going a little bit deeper on the recording and talk about mixer - master.
Stay tuned for part 2….


No comments:
Post a Comment