welcome to part 3.
(Note: cool edit pro is needed!)
In part 2 i promised you guys i would tell you some more about the mastering. In the previous blog we produced a decent quality track. Now i am going to show you how to upgrade the quality some more. Open your music project in FL studio and go to Options>audio settings. In the Mixer tab, set the interpolation to 64 point sinc. If it makes your computer slow during the the track rendering, then u can set it back to 6 point hermite.
Now we are going to export the track to a wave file. Go to File>export>wave file. Give it a name and click on save. A grey box with options pops up. Highlight the wav box in the output format. Set the wav depth to 32bit float and the quality sampler interpolation to 64 point sinc, plus all the boxes beneath must be highlighted, except for dithering. Click on start and wait till it's done.
Now we have a pretty big wave file, but it's way too big to upload it to your website or to send it through email. Cool edit pro is the program to help you fix this problem.
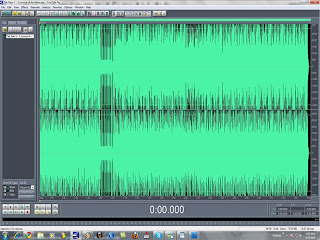
Open cool edit pro, go to File>open and select your wav file. The control panel is in the down left corner. Press play and see if the green bar on the bottom doesn't reach the red zone. You want your track to be as loud as possible but you don't want to have a distorted track.
So let's say your track reaches the red zone and that is not good. Select the full track ctrl+a and go to Effects>amplitude>amplify. In the amplifcation we want to reduce the DB. Simply drag the top block (L) to the left and you will see the db change into a negative - number. I usally cut it to -0.68 or -1.00 db. Sometimes i do less, sometimes i do more. Play with it and hear for yourself. Everytime you are not happy with it or the green bar still reaches the red zone, you can undo the amplify by doing the command ctrl+z or go to the edit and click on undo amplify. Now you can try anoter amplify cut or boost.
Ok now we have a nice loud track and no redzone. The next step is to convert the wav file into a 16 bit resolution. Press F11 and set the resolution to 16 bit. The sample rate should be on 44100. Press ok. it's ready to be saved.
Go to File>save copy as, give it a file name and click on options. The mp3 encoder options pops up. Select the CBR and MP3 and set it on 128 Kbps 44100HZ Stereo. Set the codec to High quality codec, press ok and then save.
The mp3 has the quality of a wave file but the size of an mp3. Pretty cool huh?
I will post the vsti (virtual instrument) tutorial on my next blog.
Stay tuned for the vsti tutorial....

No comments:
Post a Comment