
Search This Blog
Wednesday, May 26, 2010
Bandcamp

MAME
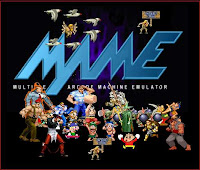
This emulator will bring back some great arcade memories.
Tuesday, May 25, 2010
Photoshop pentool tutorial

Monday, May 24, 2010
Photoshop blending, fusing


Now we are going to select the eraser and a soft brush around the 130 px. Put the flow and opacity on 25%. Start brushing away the corners and make the clouds blend in nicely.
Split second : Velocity review (PC)
The first time i played Split second i didn't like it because the cars felt rusty. You need a car that reacts really fast because you don't want to get crushed or blown up. But after a while i got used to the car handlings. I'm still not loving it but i guess it's ok.
I think this mode is going to be played alot. As soon as i have my high speed internet back, i will be playing this non stop, no doubt!
Friday, May 21, 2010
Proline MP18 - 8 GB Media Player

I uploaded some mp3's and i liked the quality. It's easy to do, just use the usb cable, hook it onto your computer and drag and drop your music to your mp3 folder.
Thursday, May 20, 2010
Basketball training (shooting,dribbling)
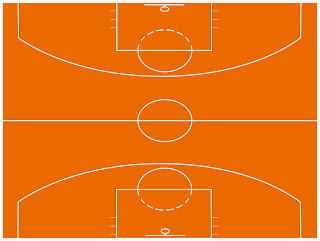
Now the offender stays in the bucket and becomes the defender. The next person can start from marker 1.
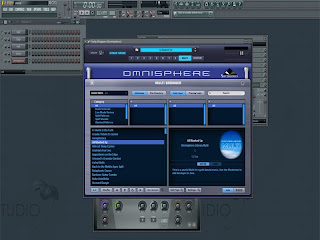
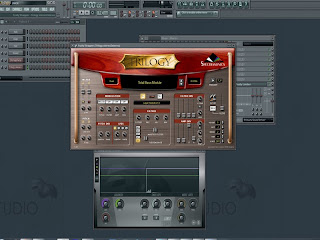
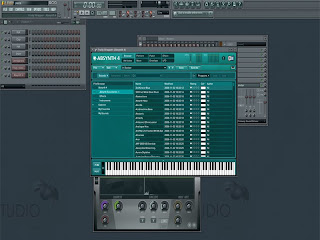
Vsti programs
Wednesday, May 19, 2010
Survival of the fittest
Feel the love my dove Prod by TekNaloG
One day i was watching warptime, a show on discovery channel. They make bullet time videos (slowmotion) with special camera's.
Monday, May 17, 2010
Photoshop for beginners coloring


Saturday, May 15, 2010
Flingstress

But without it, i wouldn't be the same!
That's why my username.
She likes and makes any type of music and that is what i love about her. Her voice is soft and powerfull, she will give you goose bumps when you hear her sing! She is the kind of person that likes to work with unknown people that are good in what they do. It doesnt matter if you are 16 or 46 years old, graduated from music school or not, if you can make beats that she diggs then she will ask you personally if she can use it.
Go to her youtube, comment/subscribe/fav etc etc.
Eric lau E.P
I found this artist a few weeks ago named Eric lau. This neo soul/hiphop producer is from the UK. Some of the artists he works with are : Oddisee, Muhsinah & Kaidi Tatham,Guilty simpson and more. I really liked the neo soul vibe tracks, i think i've played always, no regrets and understanding 100 times no joke!
So for your hiphop/neo soul lovers out there, please cop that album, it's worth the money!
You can buy his tracks @
FL 9 More mastering part 3
welcome to part 3.
(Note: cool edit pro is needed!)
In part 2 i promised you guys i would tell you some more about the mastering. In the previous blog we produced a decent quality track. Now i am going to show you how to upgrade the quality some more. Open your music project in FL studio and go to Options>audio settings. In the Mixer tab, set the interpolation to 64 point sinc. If it makes your computer slow during the the track rendering, then u can set it back to 6 point hermite.
Now we are going to export the track to a wave file. Go to File>export>wave file. Give it a name and click on save. A grey box with options pops up. Highlight the wav box in the output format. Set the wav depth to 32bit float and the quality sampler interpolation to 64 point sinc, plus all the boxes beneath must be highlighted, except for dithering. Click on start and wait till it's done.
Now we have a pretty big wave file, but it's way too big to upload it to your website or to send it through email. Cool edit pro is the program to help you fix this problem.
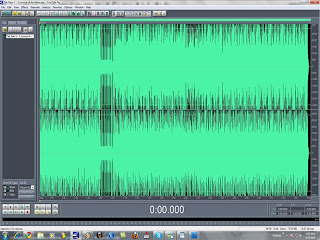
Open cool edit pro, go to File>open and select your wav file. The control panel is in the down left corner. Press play and see if the green bar on the bottom doesn't reach the red zone. You want your track to be as loud as possible but you don't want to have a distorted track.
So let's say your track reaches the red zone and that is not good. Select the full track ctrl+a and go to Effects>amplitude>amplify. In the amplifcation we want to reduce the DB. Simply drag the top block (L) to the left and you will see the db change into a negative - number. I usally cut it to -0.68 or -1.00 db. Sometimes i do less, sometimes i do more. Play with it and hear for yourself. Everytime you are not happy with it or the green bar still reaches the red zone, you can undo the amplify by doing the command ctrl+z or go to the edit and click on undo amplify. Now you can try anoter amplify cut or boost.
Ok now we have a nice loud track and no redzone. The next step is to convert the wav file into a 16 bit resolution. Press F11 and set the resolution to 16 bit. The sample rate should be on 44100. Press ok. it's ready to be saved.
Go to File>save copy as, give it a file name and click on options. The mp3 encoder options pops up. Select the CBR and MP3 and set it on 128 Kbps 44100HZ Stereo. Set the codec to High quality codec, press ok and then save.
The mp3 has the quality of a wave file but the size of an mp3. Pretty cool huh?
I will post the vsti (virtual instrument) tutorial on my next blog.
Stay tuned for the vsti tutorial....
Wednesday, May 12, 2010
FL9 Mixer - Master part 2
Welcome to part 2
So we know how to insert and record the sounds in FL. Now i am going to show you how i quantize the recordings in the layers and which filters and effects i use in the mixer to make the beat sound better.
When you don't quantize your recordings, your beat will probably sound off-beat, that's not what you want. Let's try to make a kick and a snare pattern on a 96 tempo. Don't forget to turn on the metronome cause that will help you press the keys on the right time.
I just recorded 4 kicks and 4 snares (4 second loop). When i play it back it sounds really off-beat, the kick and snare are not in line with the metronome. Stop it and let's go to the kick piano roll. You will see 4 green bars but not recorded right. Click on the the magnet. Now choose the 1/6 step. More grids (blocks) appeared. I select the 1/6 step because sometimes i like to make off-beat tracks, and on the 1/6 you can change it slightly. If you can't count 32 grids between the 1st and 2nd bar, then select the magnifier in the toolbar and click in the piano roll to zoom in.
Now we are going to quantize the kicks manually. I like to do it manually because the quantize tool doesn't always works great for me. But if you want to use it, that's fine with me.
Click on the pencil tool and press play again. Drag the 4 kicks to the lines where the metronome hits and do exactly the same for the snares. You won't even hear the metronome anymore if you did it right (kick, snare, kick, snare). But maybe the beat doesn't loop perfect. You can fix that by stretching all the 4 snares. Use the pencil tool again and go with your mouse over the end of the green snare bar. Hold the left mouse button and stretch it 8 grids (blocks). Do the same for the other 3 green bars. Now they are all 8 grids long. Press ctrl+a to highlight everything in the snare piano roll and press play again. Your loop is perfect now! You can do the same for the kicks if you want, stretch or make them smaller.
To make your loop longer, let's say 1 min, you simply copy paste the recordings and put them on the right spots.(ctrl+a/ctrl+c/ctrl+v)
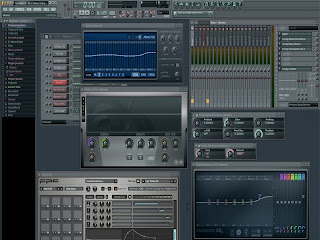
Ok let's check out the mixer. In the mix master track (the 1st one with the yellow FX block) are 8 effects slots. On nr 8 you can see the fruity limiter. It's a band compressor and i always leave it on default, but feel free to check out the other presets.
Now i'm going to tell you one of my mixer - master secrets, which effects/filters i use. On nr 1: the EQUO. On nr 2: the Fruity Bass Boost. On nr 3: the Fruity Blood Overdrive. On nr 4: Fruity Parametric EQ2. On nr 8 i leave the Fruity limiter.
So now there are 5 effects you have to tweak. Ofcourse you can do it your way but i will tell you how i do it my way, since it's my blog ;). In the EQUO i select the curve mode (bell shape) and i start dragging the left middle part (bass) a little bit up with my mouse. I do the same for the treble, it's on the right side.
The Fruity Bass Boost gives the bass in your beat a real boost so you might wan to lower it down. Turn the knob next to the FBB to the left. I always turn it down to 25/30%.
For the Blood Overdrive i do the same, 25/30%. Gives the beat more volume.
In the Fruity Parametric EQ 2 i tweak all the sliders, just a little bit.
Last but not least, the Fruity Limiter. I always use the default settings, but feel free to check out the other compressions.
Do all these things while the beat is playing. But be warned! The sound you hear in FL studio is way different than the actual mp3. Because the data you are playing in FL is raw and when you save it as wav or mp3 it comes out clean. Most of the time you think that you didn't put enough treble or bass on your beat so you going wild on the EQ or Bass Boost.
Just convert the beat to mp3 or wav, listen to it and if it doesn't sound right, go back to the mixer - master and redo some of your tweakings. That's how i did it and still do it.
You also can tweak your layers separately. Maybe you only want your kick or melody to have more bass.
Click on the kick layer and then select the insert 1 track (next to the master track). Do Ctrl+L and now you have a stand alone kick track.
In part 3 i will be talking about some more mixing and mastering and Vsti's (virtual instruments) How to install and how to use them.
So please stay tuned for part 3....
Sunday, May 9, 2010
FL9 beatmaking tutorial part 1
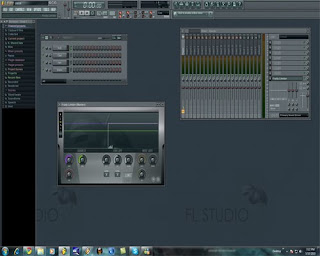
Hello fellow beat makers,
FL can be used for all genres. I've been working in FL for over 4 years now and i still love it.
First of all you want to have your midi/usb keyboard plugged into your pc. Open FL studio and test if the keyboard works, it should play the kick sample when u press a key. If it doesn't work then you can go to the options tab and click on the midi settings. Find the keyboard brand you are using in the input list, click on it and select the enable button, the box becomes orange. Now it should work, press x to close it.
In the FL mainscreen, on the left side you will see a browser with channel presets, clipboard files, collected etc etc. There you can find all the FL stock sounds. Let's say you want to use a channel presets sound. Click on it and it will show you a drop down menu with 3x Osc, Automation clips etc etc.
Click on the 3x Osc and it will show you another drop down menu with lots of sounds.
Now you can drag and drop one of the sounds onto your kick layer of the channel window. The channel window is the big grey block with the kick, clap, hat, snare layers in it. Simply drag and drop, let's say accordeon to your kick layer, the name will change into accordeon. Now you can play the sound on your keyboard.
If you are looking for another kick or snare sample, go to the packs folder in the browser and it will show you 8 drum kits and some more stuff. Just drag and drop it like explained earlier. Another way to insert sounds in your layers is by doing a right click on one of the layers, left click on insert and it will show you all the vsti’s (virtual instruments) and other stuff.
Let’s try sytrus, that is a FL vsti with lots of different instruments and sounds build in. Now you see the sytrus keyboard. If you want to use another sound in the sytrus, simply click on the left or right triangle next to the x button. Or you click on the white triangle on the left side, go to presets and all the instruments will pop up.
Ok let’s try to record something. On the FL transport panel, you will see the play, stop record buttons. The tempo is on 140. You might want to slow it down to 106 or 96. You can decide for yourself, but since you are a beginner, I would recommend you to put it much slower.
The metronome (stick with a swoosh) and the countdown (321) boxes should be on (orange) On the time bar it shows 1:01:000. That too you can change. Just click on the 2nd small block on the time bar that says BM it’s really small. Now it’s set to 0:00:00, much better right?
Press the record button and then the play button. It will count down from 4 to 1. Now you can play something while it’s recording. Press the stop button when you are done playing. You will see some green bars in the piano roll, that means that FL recorded your play, congrats ;)
Click again on the record button to uncheck the recording. Now you can listen to what you have recorded by pressing the play button. If you don’t like it then you can right click on the green bars and that way you can delete them one by one. Or maybe you want to delete everything all in once. Make sure the piano roll is selected, ctrl+ a to highlight everything and then press del. A pink bar appears, do the ctrl+ a again to remove it. You want to remove it because maybe you want to record something longer or shorter.
Yes so we recorded a melody or a drum pattern on the 1st layer.
Now we can do some more recording on the other layers. Just do the same things i explained earlier.So let’s say you have recorded in 4 layers. 1:kick pattern, 2:snare pattern, 3:melody, 4:bassline, and you want to save your work and play it in winamp or whatever music player you are using.
Go to file>save as, give it a file name and the save type should be on Fruity loops (flp). Now you just saved your music project, maybe you want to edit it later.
Go back to file>export and click on mp3 file. Give it a file name and the save type should be on MPEG layer 3 (mp3). Click on save, a grey box appears with lots of options.
On my next blog i will be going a little bit deeper on the recording and talk about mixer - master.
Stay tuned for part 2….


